Tuesday, 31 March 2015

A few bits and pieces... and unfinished business.

Just thought I'd do a quick update on what I've bought lately and were from etc.

The fridge.
We went for a Waeco 12/24/240V C1100 (110 litre) ordered from our local Jayco caravan place.
The price was comparable to online and we liked the idea of being able to take it back to the place of purchase if something were to go wrong.
We chose this one because of the low power draw on 12v and no need to have it on gas (which is a pain in the butt to certify etc).
We got the biggest one which would fit in the space when the gas is installed and the duel cooktop is in. I didn't want the bench to come up too high over the bottom of the windows.
It suits our decor too. Bonus!


I'll update you on the install when we blog about the kitchenette going in... which isn't too far off! We also got a table from Aldi (see in the background) and have modified it to suit our needs. 


Water tanks.
We were going to get some custom tanks made up to fit like Tetris under the bus but opted for some pre-fab ones from CaravansPlus (cheaper and easier to install). We will take the spare wheel from under the bus and pop it in the boot under the bed (with a cover) as there is plenty of room in there and it will distribute the weight of the water more evenly over the axles.  Here is the link for the tank for the freshwater (127 litre): http://caravansplus.com.au/catalog/product_info.php?products_id=1354
And the little greywater one: http://caravansplus.com.au/catalog/product_info.php?products_id=1345Which will sit under the shower, under the bus.

We also got a filler cap from Caravans plus (not pictured).

Table leg.
I'll blog about the dinette in the next few days but to give you an idea why we opted to spend a few more $$$ and get this Lagun leg, the dinette seat is a bench style seat. 
The table needed to be removable and very flexible in its positioning. 
It needed to be adjustable in height and I really wanted to do a fold out so it would be small enough for a laptop or tablet (without getting in the way) or big enough for two people to eat their meal off if the weather outside was yuck.
You can also buy additional mounting plates and put them in other spots if you want to move the table but I don't think we will be doing that. 
We will make the table from the same laminated wood that the bench top is made from (available at Bunnings by the sheet). It will be varnished and routed to match the bench in the kitchen too.

Gas bottle holder.
From eBay. Just a regular 9kg one. More about that later.

Outside gas door.
Fits a 9kg bottle through it. Lockable and fiberglass.
We love CaravansPlus for our smaller accessories. They are fast and have reasonable shipping rates.
Our door got damaged in transit and they replaced it!

I got a LPG storage sticker off eBay (required for approval by our gas man and our engineer man AND by law).

2.5kg Fire extinguisher.
I just bought this off eBay. http://www.ebay.com.au/itm/171412743380?_trksid=p2060353.m2749.l2649&ssPageName=STRK%3AMEBIDX%3AIT (make sure you get the right coded one).
The engineer checklist said we needed one with a hose. We already have one of those little 1kg caravan ones set into the dinette by the door (bought with the carrier at the local Jayco dealer) but it is tiny and hasn't got the hose. Can't hurt to have two! It hasn't arrived yet but I contacted the seller and he said he would throw in a free fire blanket for our trouble. I already have a fire blanket for the bus so I guess we will have one for home now too.

Narva oval LED for the kitchenette.
These are cool. They have a touch sensitive on/dim/off switch and are so flat and sleek. We have a smaller round one over the dinette and a smaller one again in the bathroom. Requires a 10mm hole ONLY to install. Awesome.
From a local shop.

Portable LED Light.
Picked this one up from a local hardware shop.
Totally cool.
Solar, battery, USB charge hybrid.


Hmm... what else?

Emergency info for seatbelt.
This is from the 'TwoThimbles' Facebook page https://www.facebook.com/twothimbles?fref=ts. The ladies make them.
Since the bus will only have my husband and I in it when traveling, it looked like a good thing to attach to the driver's side seatbelt in case of an emergency. Contact numbers and medical info such as allergies or medications go in it. The form that they included wasn't great but I will do up my own on the computer.

Batteries.
We have ordered two of the 12v 80A/H Optima ones from our local ARB store.
http://www.optima-batteries.com.au/?gclid=Cj0KEQjwi-moBRDL4Omf9d_LndMBEiQAQtFf8-XfrnSuXCY9cb2niluTRd-uj2kXx2Z1m0GkjCwqcOoaAuwx8P8HAQ
The added bonus is that they are sealed... no need to vent the box they are in!
They were kind of pricey (once again!) for the A/H and I'm sure you could get cheaper, but they come with a great name, a good warranty and are almost guaranteed to do the trick.
They seem rather small for our needs but the lower A/H means faster charging and with the good quality setup we bought, they should be perfect!
The brand is also renowned for being able to be slightly 'abused' and can withstand it if I accidentally discharge them a bit more than the recommended 30% max.

Slide out wire shelving for kitchenette.
We got these from Bunnings. Just measure up your hole and away you go.
There is only one cupboard requiring these, the other is shallower due to the gas box (perfect for glad wrap or cleaning products, I'm thinking!). The overhead cupboards will just have baskets from the $2 shop as they are short and shallow and the pantry will have regular shelving for the thermal cooker and plastic containers etc. These cupboards are all made from the same laminated pine sheets from Bunnings and held down with M8 bolts and 3mm steel 'L' pieces from Bunnings. 
Don't forget that they need to have some kind of closing and locking system which will not open while traveling along (see below).

MORE cupboard knobs.
We were very happy with the last lot we got from eBay from this seller: http://www.ebay.com.au/itm/321685779206?_trksid=p2060353.m2749.l2649&ssPageName=STRK%3AMEBIDX%3AIT
So we bought all the kitchenette and pantry knobs from the same place. They are designed for caravans and motorhomes and will pass the engineer's check.

Flooring.
We are going with cork tiles. 
Good for insulating sound/temperature, flexible, soft, lightweight easy to install/cut, won't show camp dirt too much AND they were on special at Bunnings ($15 a pack). The down side is that they dent easy (but I can't see myself walking around in heels too much in there) and they aren't as pretty as polished wood. Oh well... I am happy to compromise considering all of the pluses they offer.

In addition to all this shopping, we have been working away at:
The dinette/table,
Pantry/electrical cupboard,
Overhead kitchen cupboards,
Kitchenette,
Gas Box and outside door,
Exterior mural (hmm... I might just blog about that next!).


Saturday, 29 November 2014

Bathroom

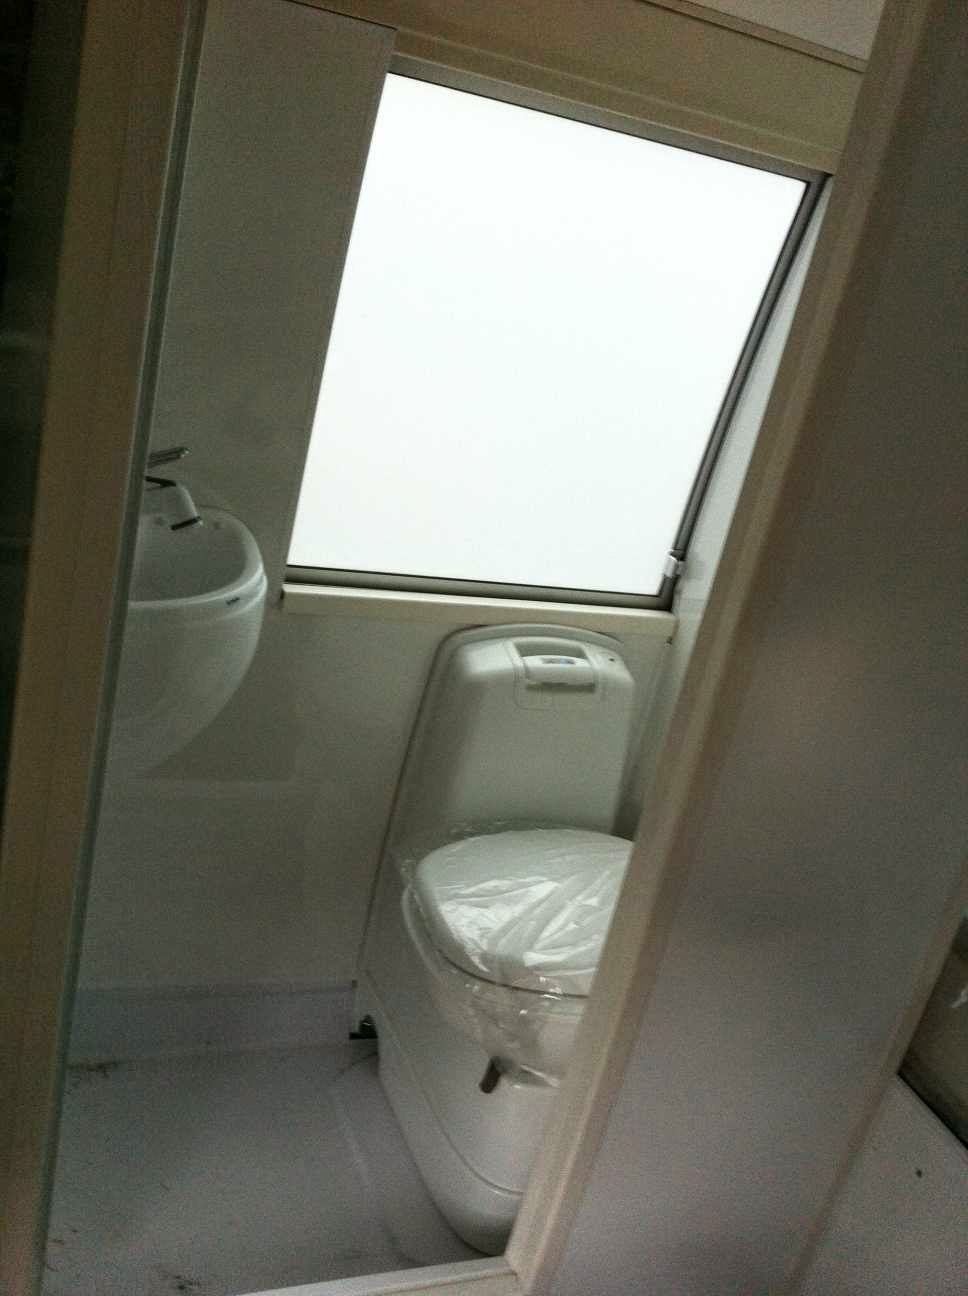
The bathroom *SORTA* got finished today!

You know I hate blogging unfinished projects, well, it hasn't been tidied up... and there is some silicone stuff to do... and the toilet isn't fully attached... but it looks the goods, so here we go!

I bought all of the stuff AGES ago from Caravans Plus  which is kinda my go-to store for things now (GREAT, fast service on all of my purchases).

I got a swivel loo, shower base (the smallest we could get because there is not a great deal of room in the bus), a corner sink with all fittings. The shower head doubles as the basin tap. It has a long, retractable hose.

After putting the wall between the bed and the bathroom, we leveled out the floor. It drops away dramatically and we didn't want water pooling. (sorry about the picture quality, it accidentally got compressed twice).
  
Next we put the base in after it was reinforced with Masonite, put the toilet in and cut the holes using the template that comes with the loo.
So damned scary.


Because we had to cut away some of the wall structure, we had to 'recreate' it and reinforce the wall of the bus again. This was done with steel and bolts. All welded to the right shape and attached. We painted it to reduce the risk of rust. We insulated just like all the other walls and the roof.


You can see I also had to cut some out of the shower tray for the toilet cassette, We will seal that up later.

Next we built the walls, pretty much the same as you'd do for your house, only with thinner bits of wood. It all had to be bolted in place and to the side/floor/roof of the bus. We've used M8 and M10 bolts for this and some steel 'L' brackets from Bunnings.


Half of one of the windows was to be changed into a wall. We had to be a bit creative with the framing there. The window is double tinted so you can't see anything on the outside. It just looks like all of the other windows, only, it has a wall in front of it on the inside!


Next was plumbing. The pipes which run through the bus walls have been shoved through conduit to protect them from rubbing. We opted for flexible stainless steel hose and fittings from Bunnings to connect the water to the solar hot water up on top (more about that later!) The fresh water hoses are also from Bunnings and are pressure rated but our Sureflo pumps aren't that strong.


The water comes through the walls, or from the roof in the case of hot water, and pop out the WallArt panel. We got our waterproof WallArt from Mitre 10. Make sure you buy the recommended adhesive and edging you require too! The plumbing will be hidden in the vanity cavity but can be accessed if there are any leaks.


Through the roof (no sunlight after two hoses being shoved in that hole and it being Sikaflexed up!)


We ran a 12V wire through the roof and have popped a little touch operated Narva LED in there for lighting.


The outside panel is thin marine grade ply which has bee painted with gloss. We did the edges with plastic edging to cover joins.


We connected the bird's nest of pipes to the vanity and mixer. VOILA! (Ignore the building mess in the shower base, I haven't cleaned it out yet). See the shower tap? That pulls out and hooks onto a holder on the wall for use as a shower.


Install toilet and it looks FABULOUS! 
We are yet to silicone around everything and seal that hole at the bottom of the toilet. I'll blog about the drainage when we do water tanks as it will go to a grey water tank.


Outside flush filler and cassette access door look pretty spiffy too!

We have purchased a 'Rollaway' door from Northcoach. The advantages of this are: Plastic, we don't need to worry about securing a glass door or engineer rating. It is lightweight. We can fit is easily ourselves. Price. Unfortunately I don't have pictures of it in the closed position. Look for those in later posts!


Sunday, 20 April 2014

ZZzz... WAKE UP! The Bed is Done!

Again, two blog posts in one day!

Remember this?
This is the beginnings of our bed. We opted for a queen sized bed. A bit heavier and space wasting than a double but really, what do you do most of inside your motorhome? Sleep of course! You might as well be nice and comfy, right?

We are hoping to do most of our cooking/camp living outside and relax under the awning so it was important to us to have a comfy queen bed. We sacrificed some bathroom and kitchen space to put it in. We measured the brand new queen mattress in my step-son's room and planned around those dimensions. I don't like seeing doonas and pillows above the window of motorhomes so hubby even accounted for the depth of the mattress just for me!

To begin with, hubby used some MDF to make those side cupboards (see previous post) and the bedhead. The frame is bolted to the floor and walls with rivnuts, 3mm steel 'L' shaped angles and M8 bolts.
Next a piece of 3mm steel tubing (rectangular, 50mmx25mm) was attached to run down the centre and support the weight of us, the mattress and bed frame.

  Using 3mm steel box, he made the bed frame in 2 parts. He has also welded some 'platforms' for the hinges (see at the top of the frame?) Half of the bed will be bolted down. This end can be accessed from the boot. Half will lift on struts. The photo above is after painting.

Next he put them in the hole, bolted the boot end to the frame and welded the hinges on (again, 3mm steel ones from Mitre10).


The slats are pine and have been routed so the edges don't dig and rub into the mattress. The handle is brushed metal (Bunnings). We tried to select a shape which wouldn't snag on clothing or bedding, in that position.


We bought two of these struts from the CaravansPlus website (click for link) and installed them using the directions on the website and four of these little brackets: http://caravansplus.com.au/catalog/product_info.php?products_id=9130 

They seem excessively powerful when just on the empty bed frame! The struts are advertised especially for beds in vans so we took their word for it and bought them anyway.


Luckily we were able to get the exact same mattress as the one we measured earlier. It was heavily discounted, being a slightly older model but at $400 and super comfy, I'm not complaining about having last season's mattress! Thank goodness for slow sales at rural furniture stores!
We squeezed the mattress through the door and got quite a fright when we wangled it almost into position... it seemed about 20cm too big! Thankfully it was just skewed and with a bit of a bump, it slid perfectly into place.

The struts work perfectly, even with the heavy mattress on top.


And that's the end of the story.

Bedhead Cupboards

We wanted to add a couple of cupboards on the back bedhead of the bus for a couple of reasons.

I wanted to be able to see out of the back window and adding the cupboards squared up the gap so a blind will fit in there more easily. It also means the reversing camera can be installed inside the bus, out of the weather and hidden away. Hubby wanted to close in the back window so the whole back would be storage. I guess this is a little compromise.

The bedhead space is handy for charging gadgets using a solar cell or the USB port we have installed. You can also toss a book up there when you're done reading and it is time for sleep... not to mention the remote control for the TV!

Here's how we did it.


Tint the window behind it nice and black so that when you're looking from the back of the bus, you don't see screws etc on the back of the cupboard (we used the same tint as for the rest of the windows... just more layers!) 
As you can see, the cupboards are made from laminated pine from Bunnings. Lighter than MDF and easy to work with. 
Cut, screw, putty, paint is basically how it works with these cupboards! There was a bit of messing about with cardboard templates and a jigsaw, to get the right curves. The back of the cupboards is the same lining as the walls. Plastic coated thin ply from Mitre10.


This cupboard hides the electrical cable for the USB port and the reversing camera cables. It is a good idea to plan out the electrical parts early, so you can hide as much as possible as you go. That conduit and the saddles are from Bunnings too. Cheap and easy. I believe it is the 20mm conduit.


Make some doors, attach matching locks (see the blog post about the top cupboards for eBay link) and tidy it all up with some timber edging. 

Friday, 11 April 2014

NEW PAGE! Thermal Cooker Recipes.

You may or may not have noticed the new tab at the top of each blog post which says 'Thermal Cooker Recipes'.

A couple of months after buying the bus, I discovered thermal cooking. It seemed like a good idea so, unwilling to spend the big bucks on a Dream Pot, Shuttle Chef or Eco Pot, I went ahead and bought a cheaper Primus Brand 'Campfire' thermal cooker for $150 at Aussie disposals. It comes with a bag, smaller inner pot and trivet. I also bought the optional mess tin for cooking cakes and bread (I haven't tried it yet).
Click here for their online store: http://www.aussiedisposals.com.au/campfire-7lt-travel-cooker

Source: Aussie Disposals website.

My friends and family own the 'name brand' pots and they work really, really well. I'm not showing a preference for any of the brands, but MY pot is excellent. I love it.

One thing I did do was buy the books from Dream Pot as the instruction manual I got with mine only had about three recipes in it. The extra books were a good investment for a beginner.
The other good resources I found were:
Eco Pot (only a few recipes here) http://www.ecopot.com.au/Contents/Page/Recipes 
Shuttle Chef (apparently they also have a book but I haven't bought it) http://www.thermalcookware.com/main.php?mod=Dynamic&id=23
and
Pinterest isn't just about thermal cooking but people have 'pinned' some of their favourite recipes on there and if you do a search, you'll find them. Also, search for 'slow cooker' or 'crock pot' or even 'dutch oven' recipes because just about anything you can cook in one of those, can be cooked in the thermal cooker.

Of course, the best way to get to know the cooker and what it can do is to EXPERIMENT!

"What does this have to do with buses or motorhoming?" You ask.

Well, they use very little energy.
For a fall-off-the-bone stew, you will use about 20-30 mins of cooking energy. For rice: 2 mins cooking time! This is a great way to save energy on the road.
Although we will have a kitchenette in the bus, we are planning to cook most meals on the camp fire or on a little butane stove outside. This cooker saves lots of energy.

It is a safe and easy way to cook while traveling.
Put the meal on at 8am when you're packing up to go to the next campground. Pull up at  lunchtime and have some of the meal at a park or something (if you'd like to). Keep driving OR enjoy some sight seeing for the day and by dinnertime, when you're tired out and just finished setting up camp, dinner will still be warm (note- if you're frightened of 'bugs' these cookers are safe for around 8 hours, after that, they recommend some reheating, which is no drama, usually only takes a few minutes).

One last reason I REALLY wanted one was because I can prepare most meals at home and pop everything into a large Ziploc bag and freeze them flat. Then, when we go camping, just grab the top one out of the bus fridge or Esky and cook it up! Having frozen meals in the fridge will save on fridge energy, they will defrost slowly and safely and will take up less space all chopped up and flat, also, I won't be spending valuable relaxing time doing food prep. I'm considering buying a vac sealer... but we will have to see about that!
Have I convinced you yet?

Back to the original reason for this blog post...

If you look at the top of the page, I have added a tab labeled 'Thermal Cooker Recipes'. As I experiment, I'll add my 'hits and misses' recipes there, so you can use them too!

Feel free to message me or comment on here if you have any recipes or suggestions that I can add.
Happy cooking!

Tuesday, 8 April 2014

Painting for the back of the bus

Hubby convinced me that I should do a mural type picture for the back of the bus.

So, a while back, we tootled off to Supercheap Auto and bought a $30 airbrush.

I had a couple of practises and put it away, thinking hubby had forgotten about the whole thing.

Yesterday he said "You know, if you airbrush the back of the bus, I can put all of the lights and handle back on it."

So I did it.

It is inspired by a picture I found on the internet but I can not find the source so I can give him creative credit (so credit to you if you ever see this Mr Artist!)

This is what I did yesterday. I kinda liked it black and white, but hubby wanted colour.

Here it is, all colourful. 

If you ever get the chance to have a go at this sort of thing, do it. It is pretty fun!

Friday, 4 April 2014

Quickie post- Reversing Camera

The power went off the morning so we couldn't get into doing the rest of the bed storage. Instead, we installed the reversing camera.

When we first got the bus, one of the first things I bought was a new touchscreen stereo/GPS/DVD thingy for the hole in the dash where they used to have a cassette player and a radio. It came with a reversing camera.

The whole unit was about $300 from eBay. It is a generic brand (I can't even add a link to the auction because it was soooo long ago!)

Anyway, now that we have installed the bedhead, we were able to put in the camera!
We had to put the old brake light back in and luckily for us, it had a little stand from when it popped up from behind the back seat, when the bus was still a school bus. The little weeny camera fits perfectly under it, so you don't even know it is there.

Now for the pictures:
 Teeny-weeny thing it is!

Connects with regular AV plugs (supplied with the unit). We have tucked them in behind the bedhead and will cover the top of it with grey/black carpet which matches the boot.

Middle of the back window, lines up with the USB socket we have installed on the bedhead too! 
(Note: The USB socket has nothing to do with the reversing camera, that is there for charging gadgets when we are using the bus).

Install the brake light. Reversing camera is invisible. You can't even see it from the outside because of the tinted window... unless you REALLY look for it.


It works!