Sunday, 10 May 2015

Its alive, ITS ALIVE! Power is ON.

Today is a good day.

We finally got the power connected.

We bought all of this stuff about a year and a half ago. It was from our local Jayco dealer and since then we have added lots of electrical goodies to our 'stash'. USB ports, ciga ports, etc, etc.

We've gradually been doing wiring and putting lights on as we go. We even installed the solar panels but they weren't connected to anything.


Remember this from WAAAAAY back? 
We managed to hide the cables as we went. The 25mm conduit and saddles are from Bunnings. Most of our electrical gear came from this guy who lives in our next biggest town but he has an eBay store http://stores.ebay.com.au/autoelecau?_trksid=p2047675.l2563 We bought metres and metres of 6mm wire from him. Good quality and nice and thick.

But lets start from the top. We bought all of the gear from ARB and opted for good quality RedARC stuff. http://www.redarc.com.au/

Our FIRST Shopping list looked like this:
-2x 150W mono panels.
-Alternator charger thingo and a relay switch so the solar shuts off and the alternator does the charging when in motion.
-Solar regulator and thermometer to shut down if it gets too hot.
-Solar display and data cable.
-A fuse.

It cost a small fortune.

We have since added:
-One more solar panel.
-2x 75AH Optima batteries 'Yellow Top' (smaller AH means faster charging and the AH works out to be okay for us... we hope) https://www.optima-batteries.com.au/
-A Narva 8 switch and fuse panel.
-A circuit breaker.
-5 and 10 port bus bars (for actives and neutrals)
-Heaps of various wiring, shrink wrap etc.
-Battery mounting brackets.

More money gone.

Anyway, my husband is an ex-electrician so I was pretty confident that all would be well.

The panels went on with rivnuts, rubber, Sikaflex and rivnuts AGES ago. Wiring joins are tucked away neatly in junction boxes and wire is in conduit which is saddled to the roof. Pretty sure I blogged about it back then.

x3

Next... well, lets let the photos do the talking.
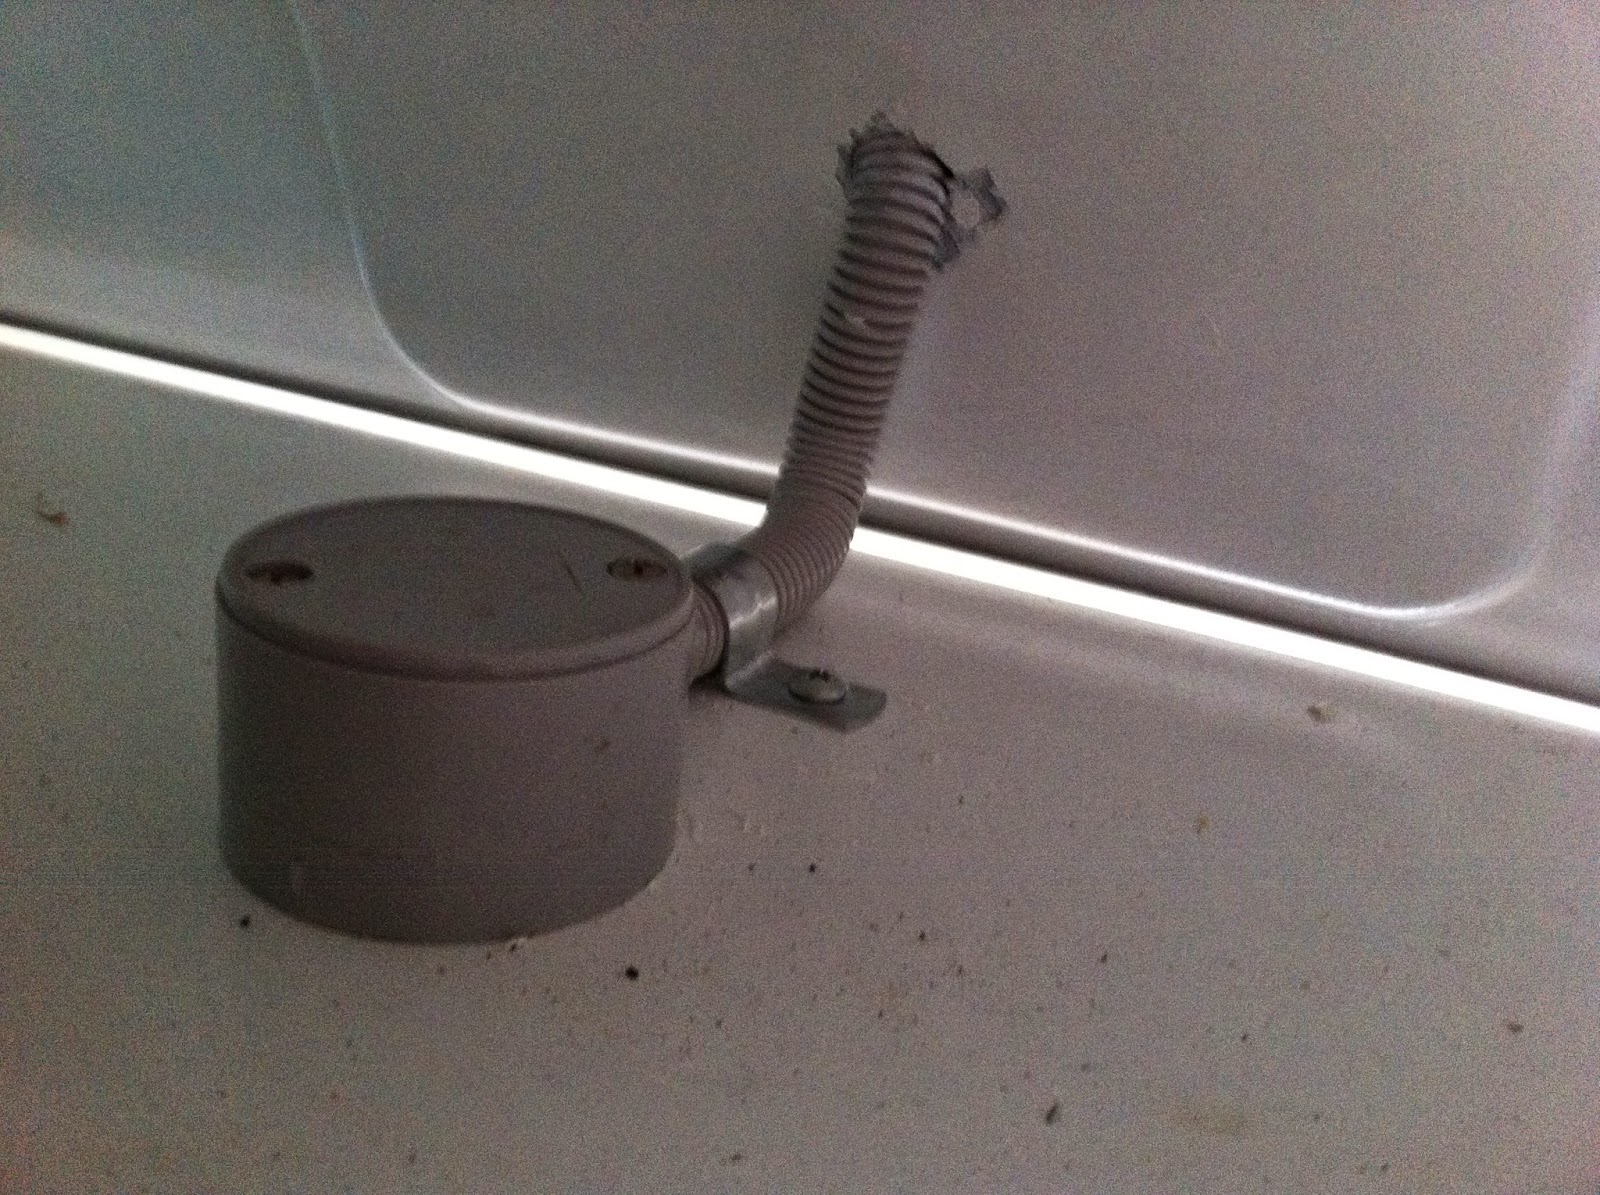

Inside wiring is mostly inside the top cupboards and 'capped' with these things. It basically means we can work on stuff without ripping walls off. This stuff is from Bunnings.


Batteries have to be vented to the outside because they can produce hydrogen gas when charging. A few 5mm holes in the floor are fine according to the engineer. These batteries are good quality and are almost guaranteed not to do it. Best to be safe though! They also need to be locked down with a strong bracket (see the one on the right) and sealed so they won't leak to the inside of the caravan.

Don't ask me about wiring, I don't know. I would suggest getting wired in by an auto-elec if you don't know about this stuff. 


Regulator on the right, alternator charger on the left (not wired in yet). There is a big fuse wired in somewhere and a temp monitor too. These are protective devices to save the equipment in extreme conditions or if there is a surge. 
I may get a 240 charger at some stage and add a port to the outside... depending on if we find we need to or not. Also, I may get an inverter. At this stage, we are not planning to have one though.


Here is the remote solar monitor. You can also see the cords above the door, There ended up being more than this lot though!


Hidden by a padded head bumper thingo I made. The light under it runs on the bus' internal lighting system.

      
Spaghetti. This all comes into a pantry type cupboard behind my passenger seat. That circular thing on the right is a speaker. The square on the left is the monitor. The door has the switchboard set into it. 


Wiring in progress. You can see the bus bars and circuit breaker on the right hand side of the cabinet. The switch board also has a fuse for each switch. Don't forget to write everything down as you wire stuff in. I've made a wiring chart to save the frustration in later years if we need to work on the wiring again. I've laminated it and will stick it in the back of the cupboard.


As you can see, there is still space for other stuff to be added later. We are considering an outdoor ciga port for an additional fridge/freezer.


Somehow the spaghetti has been tamed!


Switches with the cover off, you can see the fuses. 

Time to test it out!


The fridge is working. Awesome. 


The outdoor light works!


And this one!


Bathroom is all good!


Lots of light for the kitchenette.


Bead head lights are good too!


Lets just switch them all on.


Glow in the dark. I'm pretty happy with that!

Sunday, 5 April 2015

Kitchenette

Here is the tale of the kitchen.

Remember the fridge purchase from a few posts ago? We bought it from our local Jayco dealer. The price was close to online pricing and we liked the idea of being able to take it back to the dealer if it broke. We went for this model because reviews were good, it was a 12V with low draw, the size was the biggest we could fit in the gap in the kitchenette and it has a little freezer. It will also fit a litre of milk in the upright position. This is a must for use using UHT or if we can only get carton milk on the road.
See the fridge here.

We built the rest of the kitchenette around the fridge and gas install. We wanted to carry a small gas bottle but the box needed to store it ended up being much the same as a 9kg... so we have gone with that.

The only plumber with a 'ticket' to install gas in motor homes within 500kms turned out to be a nice bloke. He gave us some tips and instructions and I was able to send him a few pictures via email, to see if our ideas were able to be achieved. He even came down to see the bus and give our first consult free of charge! (He lives 110kms away. I guess that is ONE perk of living in a tourist town, he was able to have a 'working holiday').

Anyway, the box could be made of one inch thick 'form board' (Bunnings) which is plastic coated ply which can be used outdoors but it needed to be completely sealed and secured in a way which will withstand a massive jolt. Luckily our engineer has been training us up for securing everything well and we were easily able to bolt and lock it down with iron angles. LOADS of cutting to just the correct shape and it was in! About 3 tubes of Sikaflex later and we were ready for connection. We have made some vent holes under plumbers instruction and have had to add pipes. I suggest having a good talk to your own plumber about what will work for your install (so I won't go into too many details about ours).

We had to bolt in a 9kg bottle holder (just a cheapy galvinised one from eBay) and one of these access doors: http://caravansplus.com.au/catalog/product_info.php?products_id=14191

I also grabbed a gas storage sticker off eBay and have affixed it to the door (this is a must have item in the gas guidelines).


 Regulation gas box from the inside. You aren't allowed to be able to access the gas bottle from the inside of the bus.


Gaping hole on the outside.

As you can see above, the fridge doesn't come up past the window edge. I didn't want it to, as cleaning behind it would be difficult and I think it looks funny. I wanted to be able to open those windows up fully. The little stove/sink combo has a lift up lid which acts as a splashback/heat guard.


This picture shows how we have raised the floor inside the cupboards to match the step inside the bus, but the gas sits on the original bus floor. We insulated and covered in the walls where we could but the fridge needed a top and bottom vent to the outside. We bought stainless ones here: http://caravansplus.com.au/catalog/product_info.php?products_id=515


The water pops out from the shower wall (all hidden in the vanity for access if anything stuffs up) and the power ran in conduit under the bus and up the wall. The stove has a 12V auto ignite and the fridge needs a dedicated wire.


The bench top is laminated pine panel, as are the doors. The frame is ply and various sizes of structural pine. These are glued and screwed and then bolted to the bus with M8s and 3mm steel brackets.


These don't get the varnish... just white gloss and the same standard door knobs we've used through the rest of the bus. The large door is actually a very small cupboard as the gas box almost fills the entire space under there.

Millions of coats of varnish.


Pull out drawer system from Bunnings (those pipes will be connected and saddled to the back of the cupboard out of the way later).


The finished kitchenette! The kick-board needs to be white. We will probably put another 2.5kg fire extinguisher (with hose and bracket mount) in beside the fridge, to the far left and we have a fire blanket to attach to the wall beside the stove (all those good safety things the engineer likes). We will probably put our CO2 and smoke alarm on the roof or wall but not too close to the kitchen.

The dinette table is the same shiny varnished pine and I just completed the cushion covers for the seat today. That will probably be in the next blog post! 

Wednesday, 1 April 2015

Last bit of overhead storage DONE!

This post is about the storage above the kitchenette.

These were a little different to the ones over the bed because the foundation structure was different. The steel came up higher on the side of the bus and there is now a bathroom wall to bolt things to. We did not need to make as heavy duty frame as the previous shelving required. It is, however, still bolted with 3mm steel angle, aluminium angle, and M8 or M10 bolts and rivnuts to the steel parts.

The wood used was the same Bunnings laminated pine (sold by the panel) and other pine lengths which we cut, routed with a 'bull nose', so I don't bang my head on a sharp corner. It is puttied, sanded and painted with gloss.

We used the same 'easy fit' hinges from Mitre 10 or Home hardware but we have hung them so they open fully and do not clip into themselves (which almost never happened properly due to the movement and weight of the door).

The latches have been purchased from eBay and are those used in caravans/motorhomes (see previous posts for the link). It is a requirement that "latches are such that they do not come open under the rigors of travel" according to our engineer checklist... so that is what we bought! They lock when the knob is pressed in.  


Here you can see bolts, steel aluminum AND rivnuts used. The crack in the plastic moulding will be filled with... something... later. It is just cosmetic.


Wood edge finishes it off and ensures stray cans don't drop on our heads when we open the door.
The insulation is the same as we have used throughout the bus. It was purchased from Bunnings and has a good sound AND heat rating. 
We will line the roof with some shiny plastic covered ply stuff. We would have loved to use the same 'WallArt' as in the bathroom but it is expensive and very heavy.


We ran the cable for the light through the roof (in conduit), into the cupboard and capped it off with this thing to cover the connection and protect it from damage. All these little junction boxes, conduit, saddles etc are available from Bunnings. We got the wire online as it is specific for the job (I'll talk about it in a later post).


Here's the hinge and how we have attached it in a different way. We could only get them in a brassy colour but you don't see them much from the outside so they don't clash with the brushed pewter/silver of the other fittings.


 All done! 
Well, except for the end bit on the cupboard on the right but we have to leave that bit off to finish the electrical stuff. 

Here you can see some of the shiny lining panel (from Mitre 10) that we will continue to use when we line the roof.
On a side note: Look! The Rollaway shower screen/bathroom door from Northcoach RV can be seen and is in the closed position. We did need to cover it with frosted tint as the original door was very see through. On the right of the door we may or may not stick a full length mirror panel. We have not decided yet. http://www.northcoach.com.au/rollaway-shower-screen/

Tuesday, 31 March 2015

Side Mural

My old airbrush broke when I was doing a reading table for the local primary school.

You can't get good $23 airbrushes nowadays!

I splurged and replaced it with a $40 one.


The progress after day one. I rather like it black and white but I went ahead and did some colour anyway.


Here's the end result. It will go okay with the back and hopefully the other side... when I get around to doing it. Notice the spearhead on the dent to cover it up? The bus already had a couple of little bumps on it when we bought it. Nothing serious but they do tend to look obvious with the new bright paint job. I'm being rather strategic with the murals to mask imperfections.

A few bits and pieces... and unfinished business.

Just thought I'd do a quick update on what I've bought lately and were from etc.

The fridge.
We went for a Waeco 12/24/240V C1100 (110 litre) ordered from our local Jayco caravan place.
The price was comparable to online and we liked the idea of being able to take it back to the place of purchase if something were to go wrong.
We chose this one because of the low power draw on 12v and no need to have it on gas (which is a pain in the butt to certify etc).
We got the biggest one which would fit in the space when the gas is installed and the duel cooktop is in. I didn't want the bench to come up too high over the bottom of the windows.
It suits our decor too. Bonus!


I'll update you on the install when we blog about the kitchenette going in... which isn't too far off! We also got a table from Aldi (see in the background) and have modified it to suit our needs. 


Water tanks.
We were going to get some custom tanks made up to fit like Tetris under the bus but opted for some pre-fab ones from CaravansPlus (cheaper and easier to install). We will take the spare wheel from under the bus and pop it in the boot under the bed (with a cover) as there is plenty of room in there and it will distribute the weight of the water more evenly over the axles.  Here is the link for the tank for the freshwater (127 litre): http://caravansplus.com.au/catalog/product_info.php?products_id=1354
And the little greywater one: http://caravansplus.com.au/catalog/product_info.php?products_id=1345Which will sit under the shower, under the bus.

We also got a filler cap from Caravans plus (not pictured).

Table leg.
I'll blog about the dinette in the next few days but to give you an idea why we opted to spend a few more $$$ and get this Lagun leg, the dinette seat is a bench style seat. 
The table needed to be removable and very flexible in its positioning. 
It needed to be adjustable in height and I really wanted to do a fold out so it would be small enough for a laptop or tablet (without getting in the way) or big enough for two people to eat their meal off if the weather outside was yuck.
You can also buy additional mounting plates and put them in other spots if you want to move the table but I don't think we will be doing that. 
We will make the table from the same laminated wood that the bench top is made from (available at Bunnings by the sheet). It will be varnished and routed to match the bench in the kitchen too.

Gas bottle holder.
From eBay. Just a regular 9kg one. More about that later.

Outside gas door.
Fits a 9kg bottle through it. Lockable and fiberglass.
We love CaravansPlus for our smaller accessories. They are fast and have reasonable shipping rates.
Our door got damaged in transit and they replaced it!

I got a LPG storage sticker off eBay (required for approval by our gas man and our engineer man AND by law).

2.5kg Fire extinguisher.
I just bought this off eBay. http://www.ebay.com.au/itm/171412743380?_trksid=p2060353.m2749.l2649&ssPageName=STRK%3AMEBIDX%3AIT (make sure you get the right coded one).
The engineer checklist said we needed one with a hose. We already have one of those little 1kg caravan ones set into the dinette by the door (bought with the carrier at the local Jayco dealer) but it is tiny and hasn't got the hose. Can't hurt to have two! It hasn't arrived yet but I contacted the seller and he said he would throw in a free fire blanket for our trouble. I already have a fire blanket for the bus so I guess we will have one for home now too.

Narva oval LED for the kitchenette.
These are cool. They have a touch sensitive on/dim/off switch and are so flat and sleek. We have a smaller round one over the dinette and a smaller one again in the bathroom. Requires a 10mm hole ONLY to install. Awesome.
From a local shop.

Portable LED Light.
Picked this one up from a local hardware shop.
Totally cool.
Solar, battery, USB charge hybrid.


Hmm... what else?

Emergency info for seatbelt.
This is from the 'TwoThimbles' Facebook page https://www.facebook.com/twothimbles?fref=ts. The ladies make them.
Since the bus will only have my husband and I in it when traveling, it looked like a good thing to attach to the driver's side seatbelt in case of an emergency. Contact numbers and medical info such as allergies or medications go in it. The form that they included wasn't great but I will do up my own on the computer.

Batteries.
We have ordered two of the 12v 80A/H Optima ones from our local ARB store.
http://www.optima-batteries.com.au/?gclid=Cj0KEQjwi-moBRDL4Omf9d_LndMBEiQAQtFf8-XfrnSuXCY9cb2niluTRd-uj2kXx2Z1m0GkjCwqcOoaAuwx8P8HAQ
The added bonus is that they are sealed... no need to vent the box they are in!
They were kind of pricey (once again!) for the A/H and I'm sure you could get cheaper, but they come with a great name, a good warranty and are almost guaranteed to do the trick.
They seem rather small for our needs but the lower A/H means faster charging and with the good quality setup we bought, they should be perfect!
The brand is also renowned for being able to be slightly 'abused' and can withstand it if I accidentally discharge them a bit more than the recommended 30% max.

Slide out wire shelving for kitchenette.
We got these from Bunnings. Just measure up your hole and away you go.
There is only one cupboard requiring these, the other is shallower due to the gas box (perfect for glad wrap or cleaning products, I'm thinking!). The overhead cupboards will just have baskets from the $2 shop as they are short and shallow and the pantry will have regular shelving for the thermal cooker and plastic containers etc. These cupboards are all made from the same laminated pine sheets from Bunnings and held down with M8 bolts and 3mm steel 'L' pieces from Bunnings. 
Don't forget that they need to have some kind of closing and locking system which will not open while traveling along (see below).

MORE cupboard knobs.
We were very happy with the last lot we got from eBay from this seller: http://www.ebay.com.au/itm/321685779206?_trksid=p2060353.m2749.l2649&ssPageName=STRK%3AMEBIDX%3AIT
So we bought all the kitchenette and pantry knobs from the same place. They are designed for caravans and motorhomes and will pass the engineer's check.

Flooring.
We are going with cork tiles. 
Good for insulating sound/temperature, flexible, soft, lightweight easy to install/cut, won't show camp dirt too much AND they were on special at Bunnings ($15 a pack). The down side is that they dent easy (but I can't see myself walking around in heels too much in there) and they aren't as pretty as polished wood. Oh well... I am happy to compromise considering all of the pluses they offer.

In addition to all this shopping, we have been working away at:
The dinette/table,
Pantry/electrical cupboard,
Overhead kitchen cupboards,
Kitchenette,
Gas Box and outside door,
Exterior mural (hmm... I might just blog about that next!).


Saturday, 29 November 2014

Bathroom

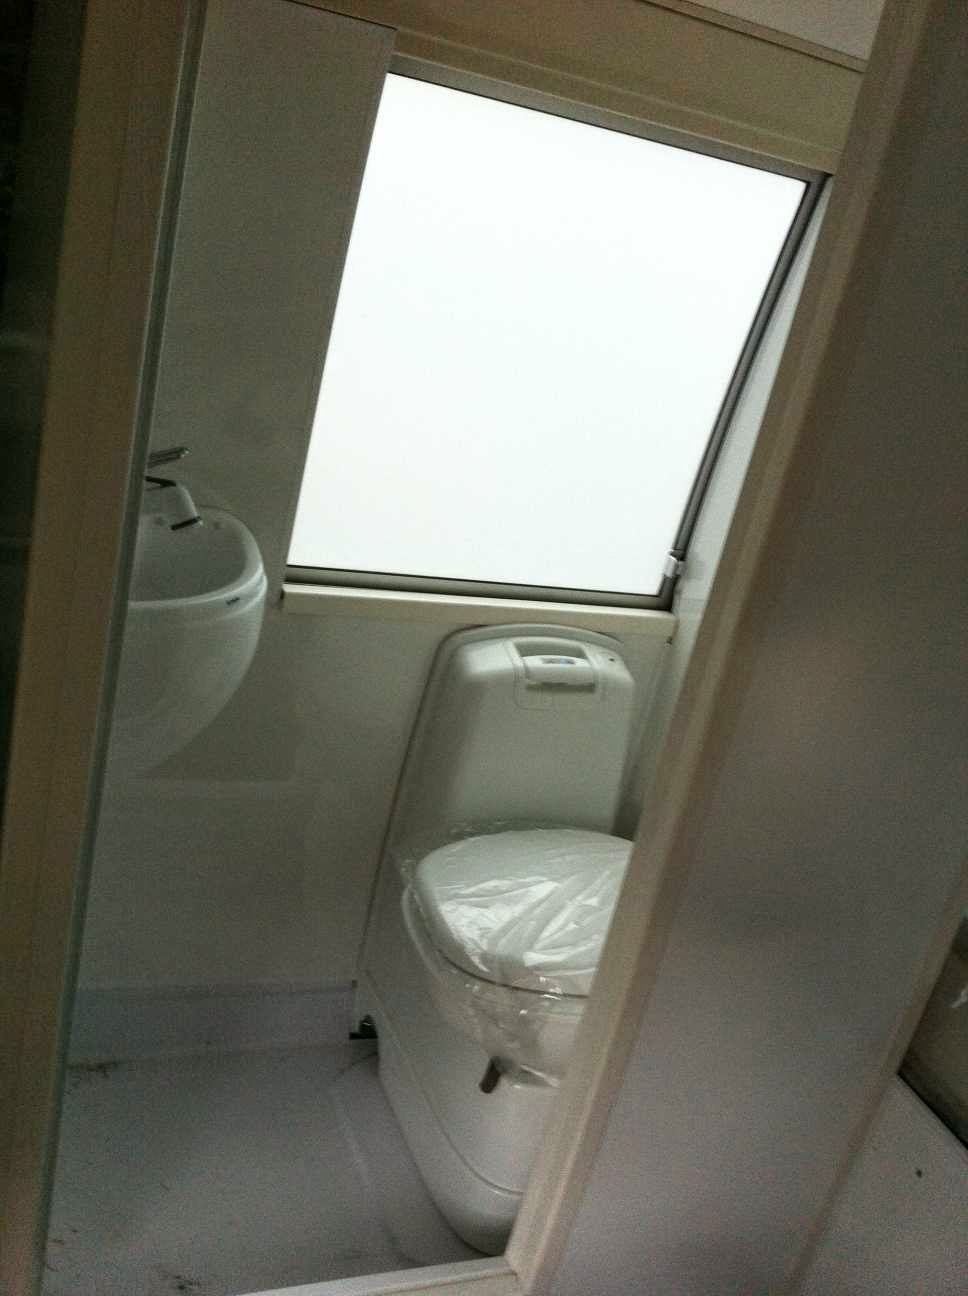
The bathroom *SORTA* got finished today!

You know I hate blogging unfinished projects, well, it hasn't been tidied up... and there is some silicone stuff to do... and the toilet isn't fully attached... but it looks the goods, so here we go!

I bought all of the stuff AGES ago from Caravans Plus  which is kinda my go-to store for things now (GREAT, fast service on all of my purchases).

I got a swivel loo, shower base (the smallest we could get because there is not a great deal of room in the bus), a corner sink with all fittings. The shower head doubles as the basin tap. It has a long, retractable hose.

After putting the wall between the bed and the bathroom, we leveled out the floor. It drops away dramatically and we didn't want water pooling. (sorry about the picture quality, it accidentally got compressed twice).
  
Next we put the base in after it was reinforced with Masonite, put the toilet in and cut the holes using the template that comes with the loo.
So damned scary.


Because we had to cut away some of the wall structure, we had to 'recreate' it and reinforce the wall of the bus again. This was done with steel and bolts. All welded to the right shape and attached. We painted it to reduce the risk of rust. We insulated just like all the other walls and the roof.


You can see I also had to cut some out of the shower tray for the toilet cassette, We will seal that up later.

Next we built the walls, pretty much the same as you'd do for your house, only with thinner bits of wood. It all had to be bolted in place and to the side/floor/roof of the bus. We've used M8 and M10 bolts for this and some steel 'L' brackets from Bunnings.


Half of one of the windows was to be changed into a wall. We had to be a bit creative with the framing there. The window is double tinted so you can't see anything on the outside. It just looks like all of the other windows, only, it has a wall in front of it on the inside!


Next was plumbing. The pipes which run through the bus walls have been shoved through conduit to protect them from rubbing. We opted for flexible stainless steel hose and fittings from Bunnings to connect the water to the solar hot water up on top (more about that later!) The fresh water hoses are also from Bunnings and are pressure rated but our Sureflo pumps aren't that strong.


The water comes through the walls, or from the roof in the case of hot water, and pop out the WallArt panel. We got our waterproof WallArt from Mitre 10. Make sure you buy the recommended adhesive and edging you require too! The plumbing will be hidden in the vanity cavity but can be accessed if there are any leaks.


Through the roof (no sunlight after two hoses being shoved in that hole and it being Sikaflexed up!)


We ran a 12V wire through the roof and have popped a little touch operated Narva LED in there for lighting.


The outside panel is thin marine grade ply which has bee painted with gloss. We did the edges with plastic edging to cover joins.


We connected the bird's nest of pipes to the vanity and mixer. VOILA! (Ignore the building mess in the shower base, I haven't cleaned it out yet). See the shower tap? That pulls out and hooks onto a holder on the wall for use as a shower.


Install toilet and it looks FABULOUS! 
We are yet to silicone around everything and seal that hole at the bottom of the toilet. I'll blog about the drainage when we do water tanks as it will go to a grey water tank.


Outside flush filler and cassette access door look pretty spiffy too!

We have purchased a 'Rollaway' door from Northcoach. The advantages of this are: Plastic, we don't need to worry about securing a glass door or engineer rating. It is lightweight. We can fit is easily ourselves. Price. Unfortunately I don't have pictures of it in the closed position. Look for those in later posts!


Sunday, 20 April 2014

ZZzz... WAKE UP! The Bed is Done!

Again, two blog posts in one day!

Remember this?
This is the beginnings of our bed. We opted for a queen sized bed. A bit heavier and space wasting than a double but really, what do you do most of inside your motorhome? Sleep of course! You might as well be nice and comfy, right?

We are hoping to do most of our cooking/camp living outside and relax under the awning so it was important to us to have a comfy queen bed. We sacrificed some bathroom and kitchen space to put it in. We measured the brand new queen mattress in my step-son's room and planned around those dimensions. I don't like seeing doonas and pillows above the window of motorhomes so hubby even accounted for the depth of the mattress just for me!

To begin with, hubby used some MDF to make those side cupboards (see previous post) and the bedhead. The frame is bolted to the floor and walls with rivnuts, 3mm steel 'L' shaped angles and M8 bolts.
Next a piece of 3mm steel tubing (rectangular, 50mmx25mm) was attached to run down the centre and support the weight of us, the mattress and bed frame.

  Using 3mm steel box, he made the bed frame in 2 parts. He has also welded some 'platforms' for the hinges (see at the top of the frame?) Half of the bed will be bolted down. This end can be accessed from the boot. Half will lift on struts. The photo above is after painting.

Next he put them in the hole, bolted the boot end to the frame and welded the hinges on (again, 3mm steel ones from Mitre10).


The slats are pine and have been routed so the edges don't dig and rub into the mattress. The handle is brushed metal (Bunnings). We tried to select a shape which wouldn't snag on clothing or bedding, in that position.


We bought two of these struts from the CaravansPlus website (click for link) and installed them using the directions on the website and four of these little brackets: http://caravansplus.com.au/catalog/product_info.php?products_id=9130 

They seem excessively powerful when just on the empty bed frame! The struts are advertised especially for beds in vans so we took their word for it and bought them anyway.


Luckily we were able to get the exact same mattress as the one we measured earlier. It was heavily discounted, being a slightly older model but at $400 and super comfy, I'm not complaining about having last season's mattress! Thank goodness for slow sales at rural furniture stores!
We squeezed the mattress through the door and got quite a fright when we wangled it almost into position... it seemed about 20cm too big! Thankfully it was just skewed and with a bit of a bump, it slid perfectly into place.

The struts work perfectly, even with the heavy mattress on top.


And that's the end of the story.